Single-Node Installation
This is the Pigsty single-node install guide Single Node. For multi-node HA production deployment, refer to the Deployment docs.
Pigsty single-node installation consists of three steps: Install, Configure, and Deploy.
Summary
Prepare a node with compatible OS, and run as an admin user with nopass ssh and sudo:
Choose a Pigsty download mirror:
This command runs the install script, downloads and extracts Pigsty source to your home directory and installs dependencies. Then complete Configure and Deploy:
Enter the Source Directory
Generate the Inventory
Skip this step if you already have a prepared pigsty.yml.
Run the Deployment Playbook
After installation, access the Web UI via IP/domain + port 80/443 through Nginx,
and access the default PostgreSQL service via port 5432.
The complete process takes 3–10 minutes depending on server specs/network. Offline installation speeds this up significantly; for monitoring-free setups, use Slim Install for even faster deployment.
Video Example: Online Single-Node Installation (Debian 13, x86_64)
Prepare
Installing Pigsty involves some preparation work. Here’s a checklist.
For single-node installations, many constraints can be relaxed—typically you only need to know your IP address. If you don’t have a static IP, use 127.0.0.1.
| Item | Requirement | Item | Requirement |
|---|---|---|---|
| Node | 1-node, at least 1C2G, no upper limit |
Disk | /data mount point, xfs recommended |
| OS | Linux x86_64 / aarch64, EL/Debian/Ubuntu |
Network | Static IPv4; single-node without fixed IP can use 127.0.0.1 |
| SSH | nopass SSH login via public key |
SUDO | sudo privilege, preferably with nopass option |
Typically, you only need to focus on your local IP address—as an exception, for single-node deployment, use 127.0.0.1 if no static IP available.
Install
Use the following commands to auto-install Pigsty source to ~/pigsty (recommended). Deployment dependencies (Ansible) are installed automatically.
Choose a Pigsty download mirror:
If you prefer not to run a remote script, you can manually download or clone the source. When using git, always checkout a specific version before use.
For manual download/clone installations, run the bootstrap script to install Ansible and other dependencies. You can also install them yourself.
Configure
In Pigsty, deployment blueprints are defined by the inventory, the pigsty.yml configuration file. You can customize through declarative configuration.
Pigsty provides the configure script as an optional configuration wizard,
which generates an inventory with good defaults based on your environment and input:
The generated config file is at ~/pigsty/pigsty.yml by default. Review and customize as needed before installation.
Many configuration templates are available for reference. You can skip the wizard and directly edit pigsty.yml:
The output below is from the current main branch (v5.0.0-preview). If you install another version, the first line reports that version.
Current main branch configure output
Common configure Arguments
-i | --ip,The primary private IP of the current host, used to replace the
10.10.10.10placeholder in the inventory.-c | --conf,A configuration template name relative to
conf/, without the.ymlsuffix.-v | --version,PostgreSQL major version
14through19; PG19 is Beta, so use the dedicatedpg19template.-n | --non-interactive, ,Use command-line arguments for the primary IP and skip the interactive wizard.
-x | --proxy, ,Use current environment variables to configure
proxy_env.
If your machine has multiple IPs bound, use -i|--ip <ipaddr> to explicitly specify the primary IP, or provide it in the interactive prompt.
The script replaces the placeholder 10.10.10.10 with your node’s primary IPv4 address. Choose a static IP; do not use public IPs.
We strongly recommend modifying default passwords and credentials in the config file before installation. See Security Recommendations for details.
Deploy
Pigsty’s deploy.yml playbook applies the blueprint from Configure to target nodes.
Example deployment output
When you see pgsql init done, PLAY RECAP and similar output at the end, installation is complete!
Upstream repos used by Pigsty (like Linux/PGDG repos) can sometimes enter a broken state due to improper updates, causing deployment failures (this has happened multiple times)! You can wait for upstream fixes or use pre-made offline packages to solve this.
Warning: Running deploy.yml again on an existing deployment may restart services and overwrite configurations!
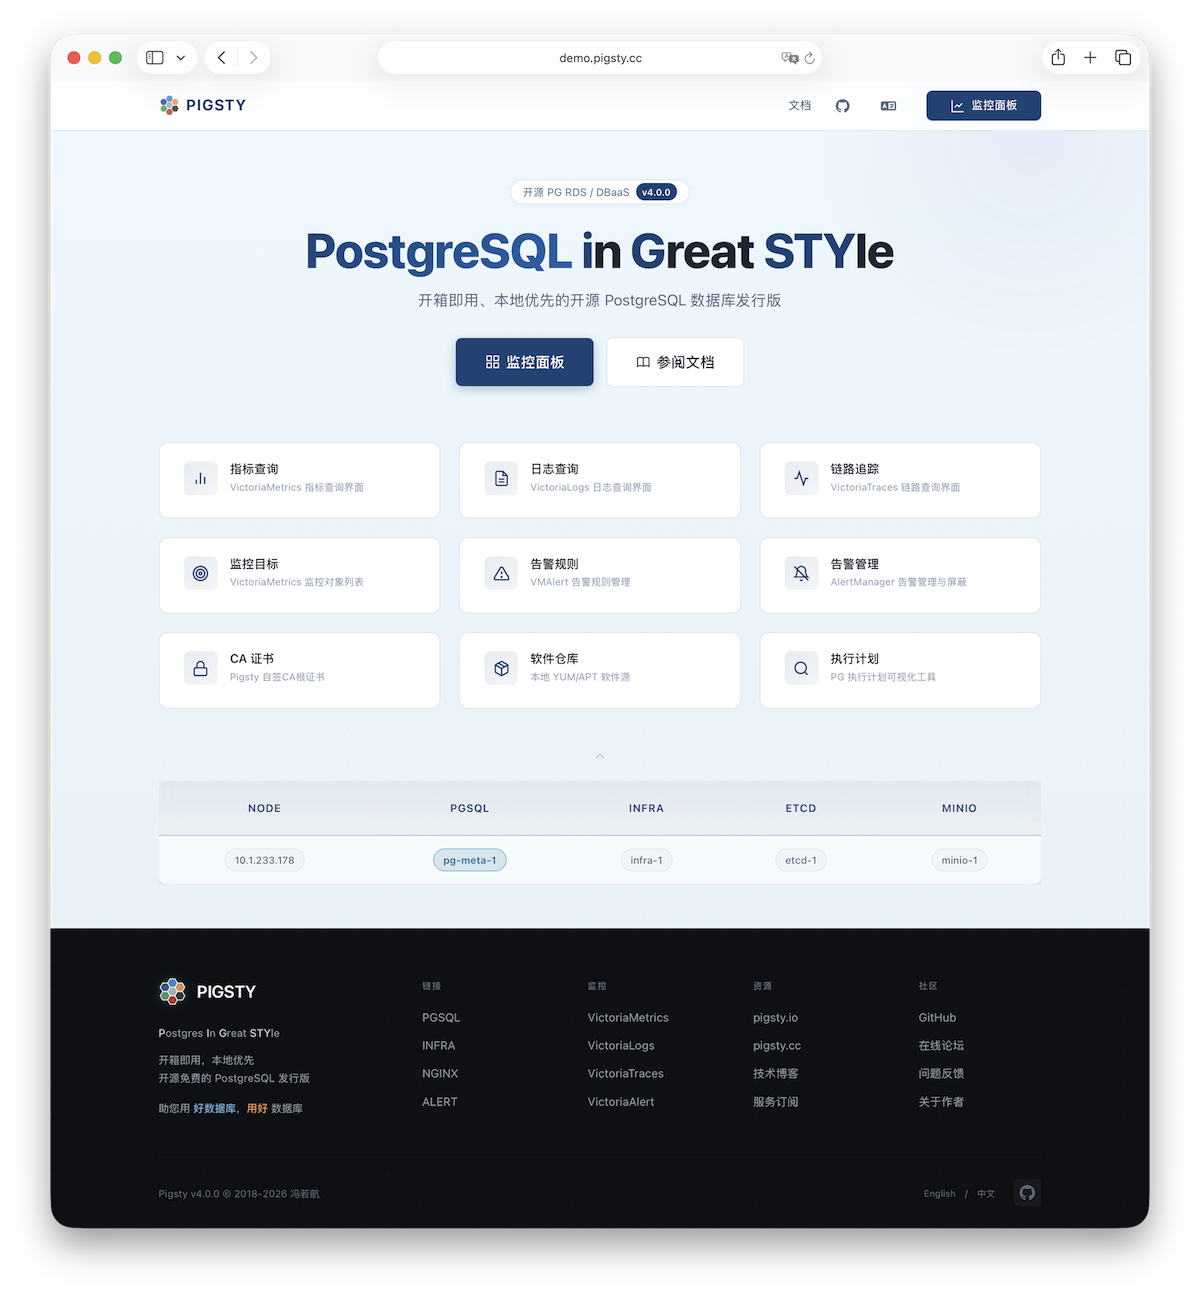
Interface
After single-node installation, you typically have four modules installed on the current node:
PGSQL, INFRA, NODE, and ETCD.
The INFRA module provides a graphical management interface, accessible via Nginx on ports 80/443.
The PGSQL module provides a PostgreSQL database server, listening on 5432, also accessible via Pgbouncer/HAProxy proxies.
More
Use the current node as a base to deploy and monitor more clusters: add cluster definitions to the inventory and run:
Most modules require the NODE module installed first. See available modules for details:
PGSQL, INFRA, NODE, ETCD,
MINIO, REDIS, DOCKER……